Adding Organic Matter to Soil
Many are the ways one can add organic matter to soil, as mentioned in the Adaptation post.
We’d like to focus on a key part of the garden that makes the most of kitchen scraps among other things! There are volumes of wisdom available to folks about how to maintain compost piles in garden spaces.
The long and short of it is, adding natural organic matter to your garden soil increases water retention, which is critical in drought. The more water your soil holds in the hot dry summer to come, the greater the chance your plants will have to thrive.
This is a topic that can really lead you down a wormhole! If you have time to travel that richly informative route, we encourage you to learn more. Either way, we’ve got two approaches to compost to share!

From Ana Sigler, our Bookkeeper Extraordinaire, Co-op owner, and seed grower of Plum Shed Seeds in Sandpoint, ID
“Our compost pile has PILED up over time since Henry (Ana’s husband) bought the property in 2012. For a long time, it didn't do much until we remembered to start turning it more regularly. Worms were added probably more than 10 years ago and haven't been added since. They have just kept going and multiplying.
All of our kitchen waste and non-weed garden waste goes into this pile. We try to balance it out between green and dry plant parts. We have learned that coffee grounds aid our pile beautifully! We also add the shredded SRSC paperwork after we've scanned it into our electronic filing system. Henry adds ash from fire pits periodically. This random combination, with very little planning, has helped us develop incredible quality in our compost. It takes a while to get to this amount but I haven't needed to buy compost in years.
Two years ago, Henry made me this compost screen and it works beautifully to screen my compost and give me this nice texture for spreading on my garden beds. I will be utilizing this soon to start prepping the beds throughout our yard.”

From Reiley Ney, Finance and Grower Relationship Builder of the Co-op:
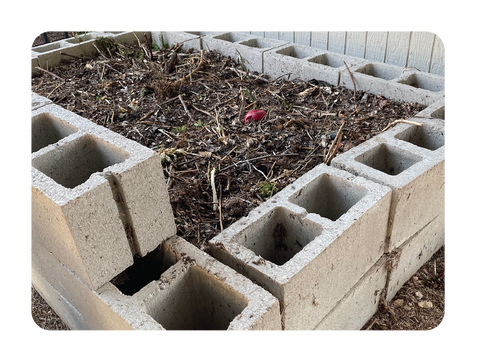
"Of everything we grow in our garden, we are most proud to grow nutrient-rich soil! It's very exciting to watch the composting process! We started adding our vegetable food scraps, leaves, grass clippings, and egg shells to a pile on the side of our house 2-3 years ago. I also add Snake River Seeds' germination tests to our compost pile so the seeds are respectfully returned to the Earth. Shortly after we started our pile, we discovered that our scavenger-of-a-dog was sneaking into the pile for tasty treats (ew!) so we decided to surround the pile with cinder blocks to keep him out of it. We use a shovel and a pulaski to turn and chop up the compost every month or two when it's not frozen. We also add water about once per month in the spring and summer. We just recently decided to stop adding to our pile so we can allow everything to process into soil. We're hoping to harvest the compost for the first time later this year!"
Another Recycling Option
Milk and juice jugs are finding new purpose as many people are using them as a season-extension option, referred to often as “winter sowing,” especially in colder growing zones. This winter has been a very cold one, but gardeners looking to start a lot of food this year have turned to this method to begin all sorts of seeds early, based on the successes of area gardeners last season.

Here’s how to start:
- Rinse the jug of choice, and discard the lid.
- Poke holes in the bottom for drainage, carefully.
- Cut the jug in half just under the handle.
- Add 2-4 inches of potting soil vs. soil from your yard or garden. Organic potting soil comes with a blend of nutrients your seedlings will need to get their best start.
- Saturate the soil with water.
- Sprinkle seeds on top.
- Cover them with the amount of soil indicated for planting depth on the seed packet.
- Sprinkle water over this.
- Duct tape the jug back together.
- Label with the date of planting, the seed name.
- Place the jug in a sunny location and wait with great anticipation!
The seeds will start when they are ready, adapting to the cold from the beginning of their lifecycle. When your seedlings grow to a robust enough size, you will gently separate them and transplant them. If you’re trying this out with warm weather crops that are taking off a bit earlier than the recommended time to transplant them, you might place the jug in a semi-shady location to slow their growth.
Many gardeners start seeds this way as early as January, but there is still time to try some varieties you would direct-seed now, vs. seeds you can plant as soon as the soil is workable. Follow the seed packet and try crops that will have enough time to reach maturity. It’s a little bit late for some brassicas or any alliums, but you could try flowers such as zinnias, nasturtiums, and celosia. Some folks are trying cucumbers and other warm season crops. In many areas it’s time for direct seeding many root vegetables, so save your jugs to try other things.
With any new crop we’re flying by the seat of our pants! Gardening is a practice of discovery and adjustment. Have fun!
Photos of seedlings in jugs from Julia Bennett Sanderson !


